Teams Premium, what can you do with it in Meetings and Webinars?
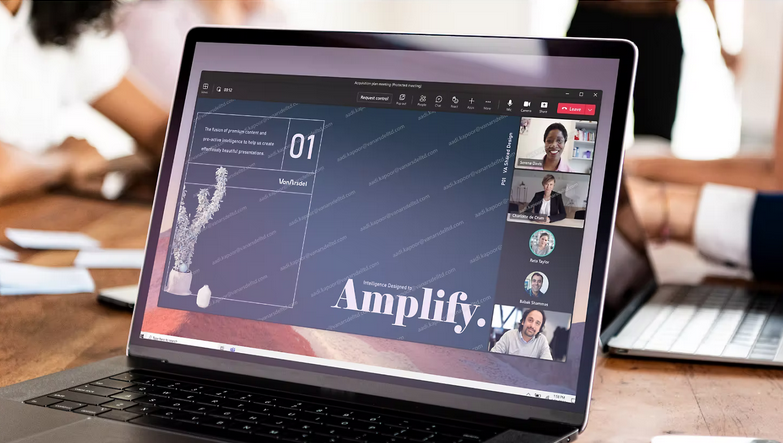
Microsoft Teams Premium makes Teams meetings more personalized, intelligent, and secure, with branded meetings, intelligent recap and search, live translated
captions and advanced meeting protection. It also provides advanced webinar and advanced Virtual Appointment experiences.
Was it a mouthful? Definietly not! On this blogpost I will go through all the bells and whistles. Specially for the Meetings and Webinars section

Here you can see the list on what you can do with Premium Teams and normal Teams. Let’s dive in to those Premium features which aren’t included in the basic Teams package.

- Customize meeting templates for your organization
Microsoft Teams custom meeting templates allow you to specify values for many of the meeting settings available to meeting organizers. Templates can configure settings that meeting organizers can change or can lock settings so that meeting organizers can't change them.
- Add organization branding to meeting lobbies
Customization in Teams meetings allows organizations to extend their visual identities across the meeting experience.
An organization’s images and colors help foster internal corporate culture building and increase overall brand awareness with guests.
With the help of an organization's brand management and corporate communications teams, tenant admins can easily set up and create meeting themes for various business units and departments within a single tenant.
By default, Teams premium licensed users who have been assigned a meeting customization policy can create meeting themes-enabled meetings. These meetings feature themes by default, and anyone who joins the meetings can see the themes (including unlicensed internal users, guests, and anonymous users).
Remember, attendees joining Teams through the Web experience won't be able to see meeting themes.
- Customize meeting backgrounds for your organization
Using custom meeting backgrounds help increase overall brand awareness with both internal and external meeting participants.
By default, Teams premium licensed users who are either admins or have been assigned a meeting customization policy can create meetings that feature custom meeting backgrounds. These custom backgrounds will only be available for end users within your organization who have a Teams Premium license to use.

- Customize Together mode scenes for your organization
Custom Together Mode scenes in Teams meetings provide an immersive and engaging meeting environment with these actions:
Bring your users together and encourage them to turn on their video.
Your participants will merge digitally into a single virtual scene.
Place the participants' video streams in pre-determined seats designed by you, or your creator
In custom Together Mode scenes, you can make your own scenes using the Microsoft Scene studio. With this pre-designed scene setting, users have seats with their video streams. The videos are rendered into those seats.
- Read live translated captions during meetings
End users can choose the Live Captions in the language they prefer, with the help of Microsoft Cognitive Service Speech Translation Capabilities. This will help users to participate even better in meetings when the spoken language is not their own.
- Translate post-meeting transcriptions (coming soon)
As the title says, you can translate those post-meeting transcriptions, but we will dive into it as soon as it comes available.

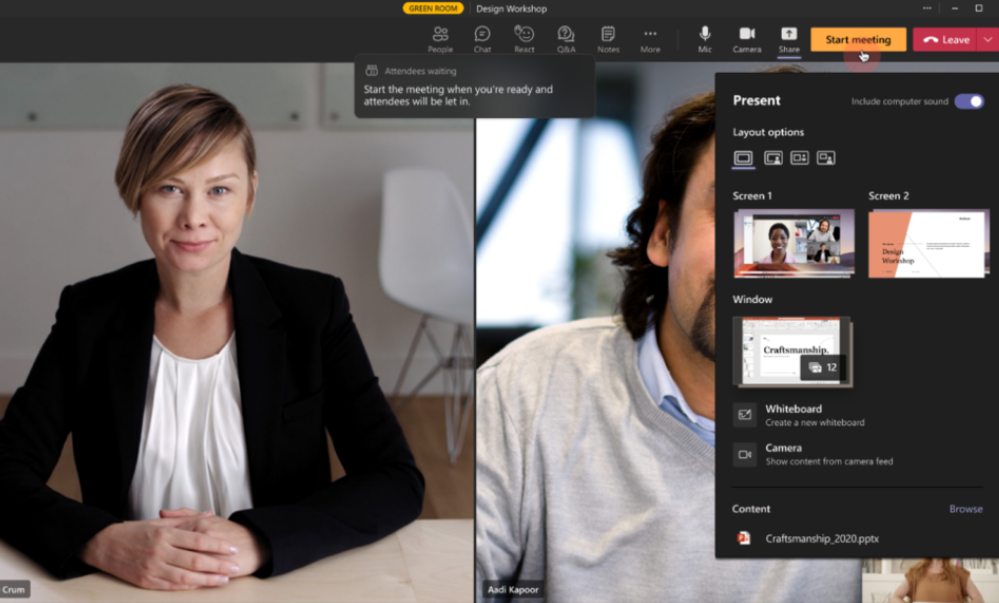
The next one is Webinars. There are Green rooms, you can manage attendees’ view. etc.

Set up a green room for webinar presenters
From the green room, organizers can change meeting options and let end users go from the lobby into the meeting.
But what can the organizer and presenter do:
Chat (the global chat that is available to all in the meeting).
Manage what attendees see.
Turn on captions.
Add apps to the meeting, such as Q&A. When you add an app to the meeting, attendees can use it while they wait.
Access meeting notes.
See/remove participants.
See other presenter/organizer’s audio, video, and shared content.
React/see reactions.
Start the meeting. Only presenters and organizers who join using Teams for desktop or web (Edge and Chrome browsers) can start the meeting.
Organizers and presenters can’t change the meeting layout or turn on transcripts, recording, or Speaker Coach from the green room. They can do that when the meeting starts.
- Manage attendees’ view
To manage what attendees see:
In Teams, go to Calendar and select a meeting.
Select Meeting options.
Turn on the Manage what attendees see.
Change the meeting setting Who can present ? To specific people
Type and select presenter names in Choose presenters
To Minimize disruption, turn off the Allow mic for attendees And Allow camera for attendees.
To bring someone on screen during a meeting:
Find who you want to focus on in the left panel.
Remember: Presenters, organizers, and attendees with their hands raised will appear in the left panel.Hover over their video or avatar and select More options.
Select Bring on screen.
Spotlight an attendee during a meeting by changing their role to presenter:
Select Show participants.
Hover over the name of the person whose role you want to change and select More options.
Select Make a presenter.
Presenters will need to turn an attendee’s mic and camera on before bringing them on screen, and turn them off once the attendee is off screen.
- Send reminder emails to registrants
To build excitement and attract attendees to your webinar, you can send automated reminder emails before your great event. These emails will be sent to every confirmed registrant on the day of the event and will include a custom-branded header, webinar details, and a link to join the event.
- Create a webinar wait list and manually approve registrants
The registration experience gets even better in Teams Premium with registration waitlist, manual approval, and custom registration start and end times. Enabling the waitlist will keep webinar registration open even after the event has reached the capacity set by the organizer to allow additional people to register and be automatically added to the waitlist. As new spots open, people will be automatically moved to the pending approval state, which enables the organizer to review their registration information and manually approve or reject each of the registrants. In addition, you can customize the registration start and end time to specify when you want registration to start and end, making it easier to plan for and manage your event.
- Use RTMP-In for Webinars (coming soon) Support for streaming is coming later…
If you want to know more, feel free to contact me. :)